From Typing Tests to Vagrant Machines
Week 5 of My DevOps Journey: Typing Speed App, Build Tools, Vagrant, and YAML
Introduction
Hello there! It's been a while. I'm really sorry for not uploading anything for the past 3 weeks — life got a little hectic due to a hackathon our team participated in, mid-semester exams, and some other personal stuff. But I’ve promised myself to try my best to stay more consistent from now on.
Despite the packed schedule, I didn’t completely pause my learning. I still managed to: ✅ Build a solo Web Development project
✅ Learn more about Build and Package Manager tools
✅ Dive deeper into Vagrant and Linux servers
✅ Get started with YAML
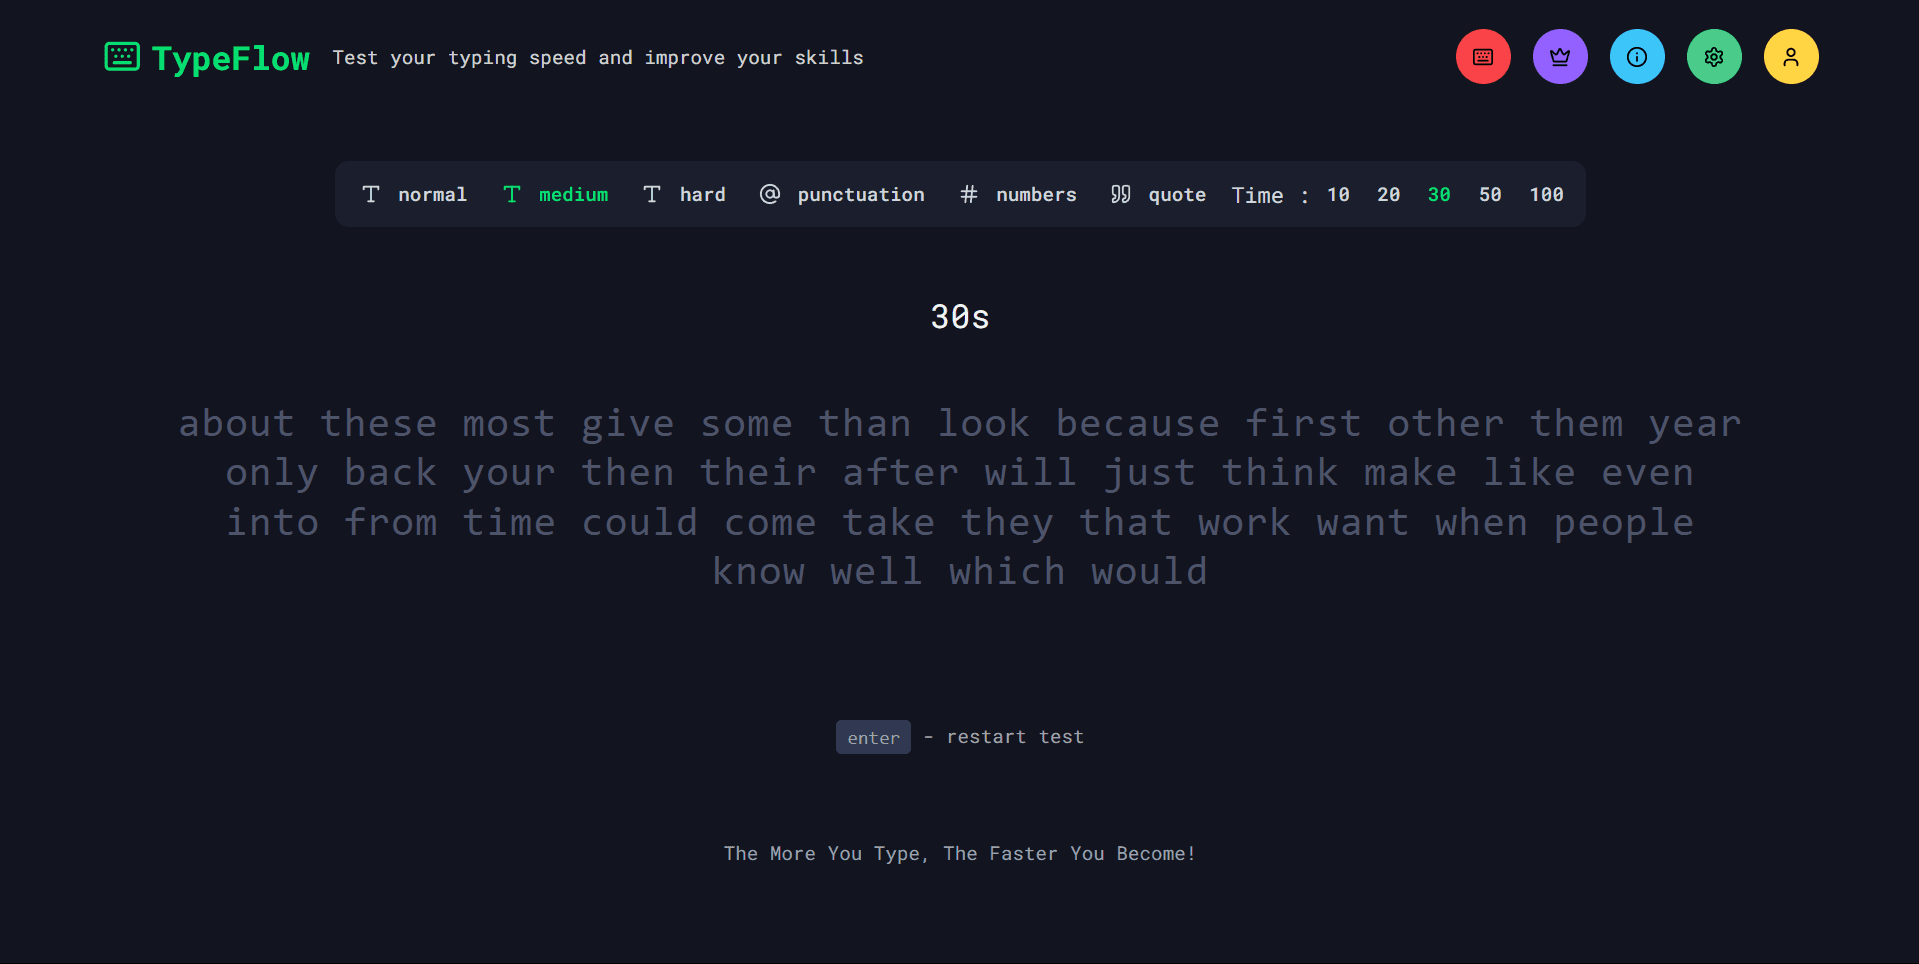
Building a Typing Speed Test Application
Just before the exams, I was casually testing my typing speed on MonkeyType, and as I was completing test after test, I couldn't help but wonder — How exactly is typing speed, raw speed, accuracy, and errors calculated?
While I had a rough idea about these parameters, I was curious about the logic behind implementing them. So, I asked ChatGPT how these parameters are calculated, and it gave me a clear explanation of the process.
Excited, I decided to put this into practice by building a simple Typing Speed Test as a single-page application. I implemented:
Logic to generate random words.
Display the generated words to the user.
Allow the user to type in an input box.
Check each character typed against the generated words.
Highlight errors by displaying wrong characters in red.
Calculate typing speed dynamically.
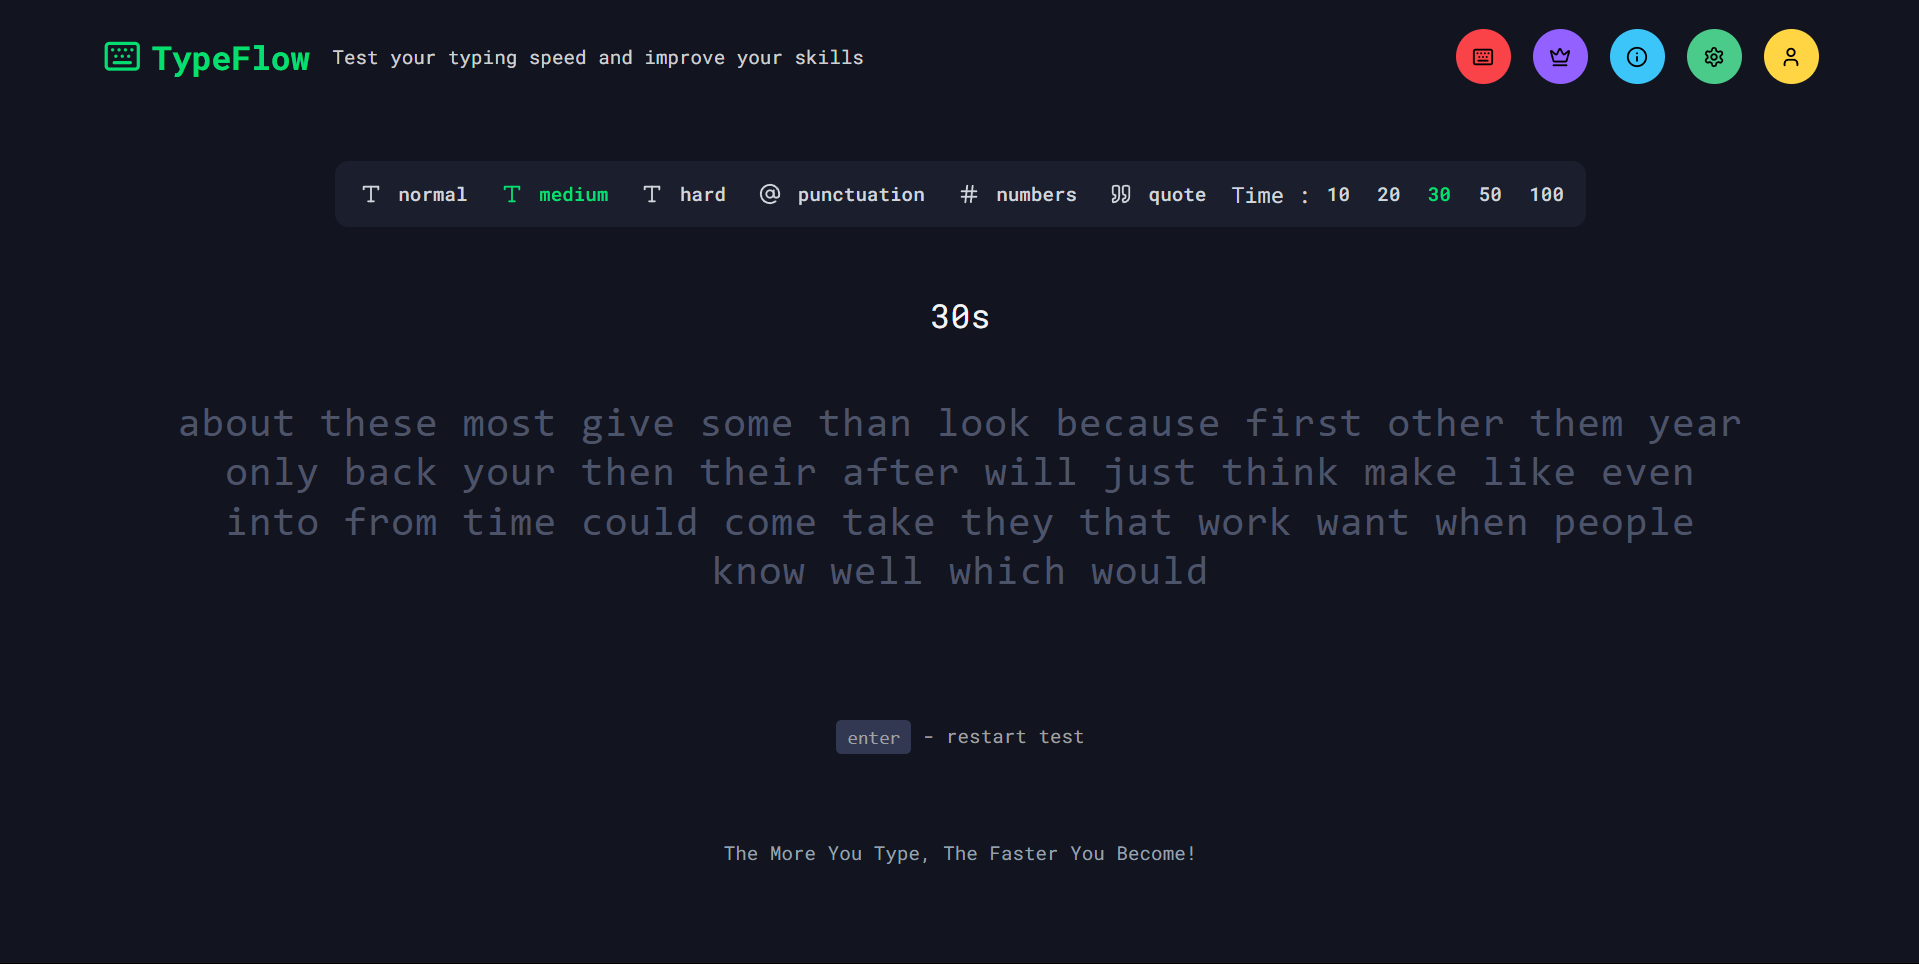
Improving the Application
While testing, I noticed that I had to refresh the page every time I wanted to try a new test, which was quite annoying. So, I added a restart button to reset the test without refreshing.
Then I thought — why stop here?
I went on to:
Add raw speed and accuracy calculations.
Integrate a results section with a graph.
Create settings to change:
Font size
Font family
Enable/disable typing sounds
Implement user authentication (which turned out to be challenging).
Develop a leaderboard.
Build an about page.
This turned into my first solo full-stack web development project after a long time!
Tech Stack Used:
Next.js
TailwindCSS
NextAuth
Prisma
PostgreSQL
Shadcn UI
Vercel (for deployment)
➡️ Check out the GitHub repository here: TypeFlow Repo
Continuing DevOps Learning: Build & Package Manager Tools
After completing my web project, I resumed my DevOps journey.
Previously, I had learned to build Java applications using Gradle. This time, I expanded my knowledge by:
Learning how to build Python projects using setuptools.
Setting up a
setup.pyfile.Understanding what a wheel (.whl) file is.
Exploring NPM for JavaScript projects.
Understanding the build process of JS applications.
Differentiating between a Library, Package, and Framework.
Deep Dive into Vagrant & Linux Servers
I had earlier used Vagrant briefly to create a VM when I first started with Linux. This time, I took it a step further.
I learned how to:
Configure Vagrant using a VagrantFile:
Choose which Vagrant Box (OS) to use.
Allocate RAM and CPUs.
Automate provisioning.
Create Synced Folders:
- Share files between the host machine and the virtual machine.
Small Projects to Practice:
1️⃣ Hosted a basic HTML template inside a VM.
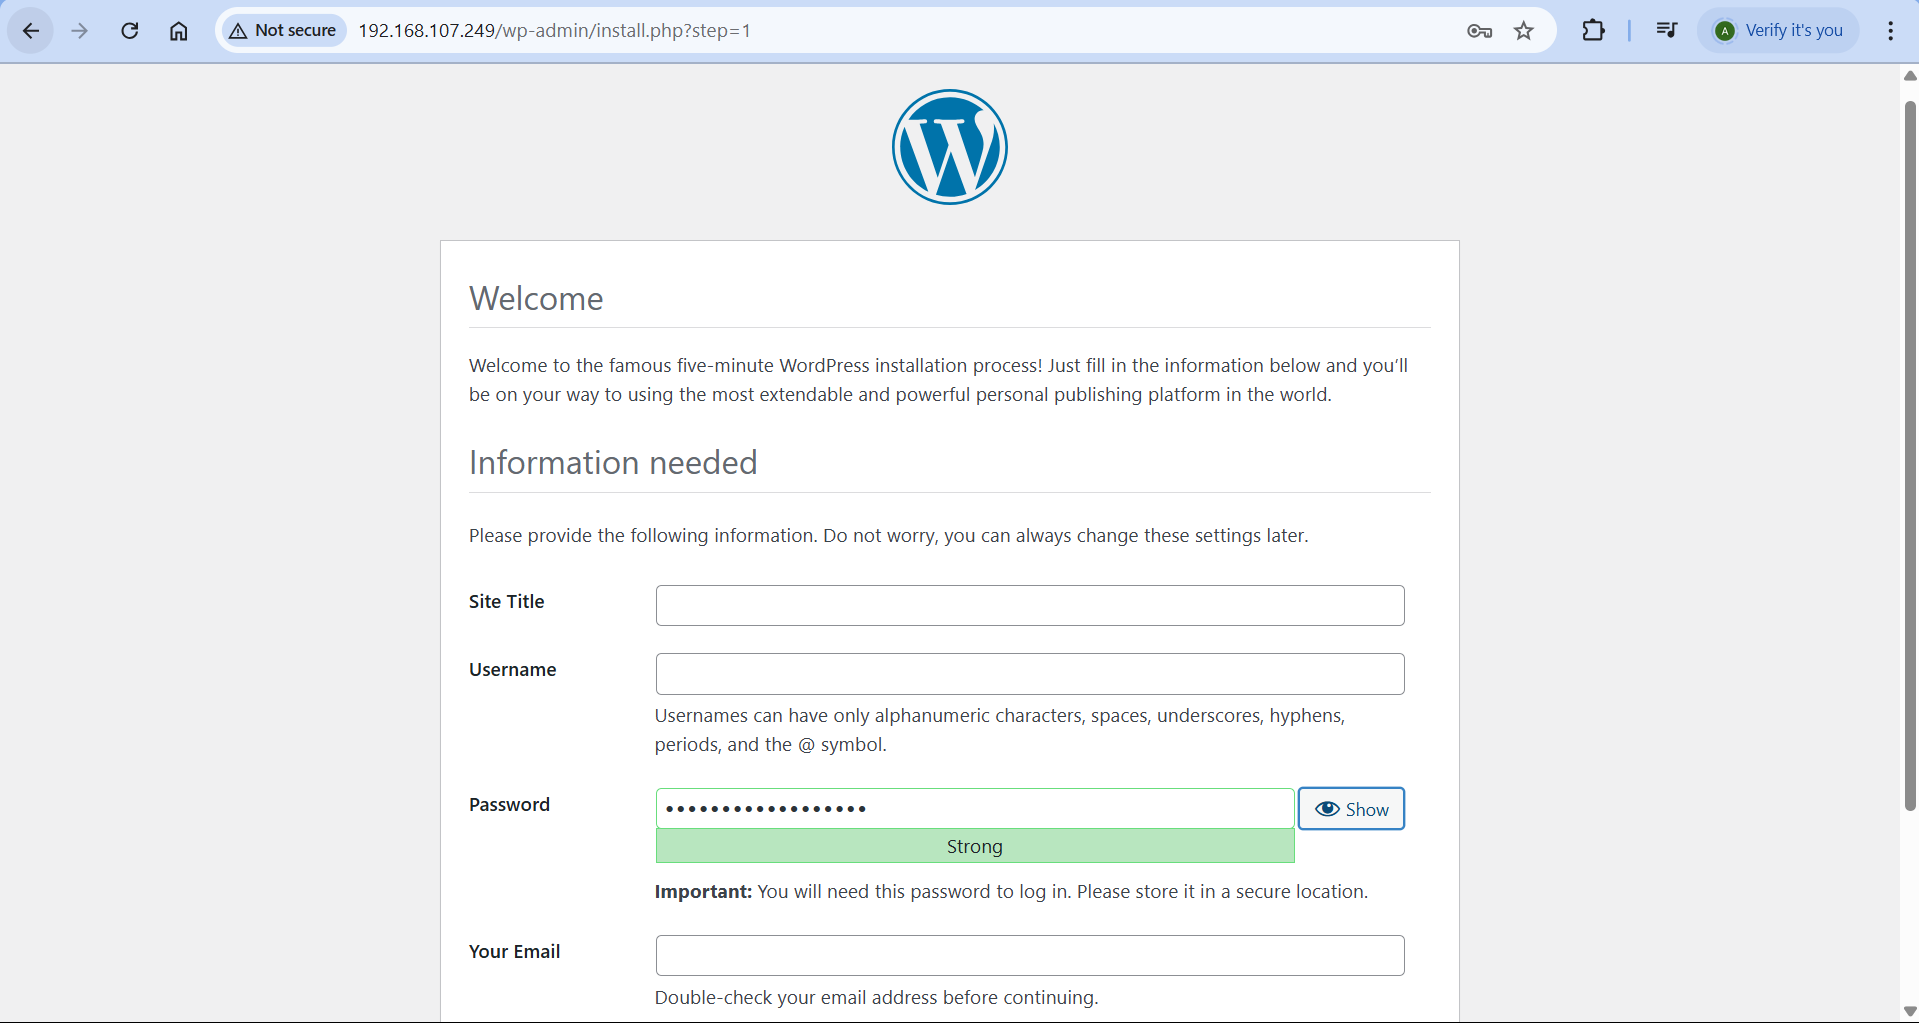
2️⃣ Hosted a WordPress configuration setup for blogging inside a VM.
For both:
First, I performed all steps manually to fully understand each action.
Then, I automated the entire setup using VagrantFile so that when the VM boots, everything is ready automatically.
This helped me get hands-on with:
Provisioning
Service management
Hosting applications
I also explored how to provision Multi-VM setups using a single VagrantFile. This was something I had been curious about, and accomplishing it felt rewarding.
Getting Started with YAML
Today, I finally got started with YAML — a human-readable data serialization language, just like XML and JSON.
What is Data Serialization?
Serialization is the process of converting data structures into a standard format so that they can be transferred between applications or services.
What I Learned:
Basic syntax of YAML.
Declaring various data types and structures.
Writing real-world examples like an Nginx web server configuration.
Sample YAML Example:
apiVersion: apps/v1            # API version used
kind: Deployment               # The type of Kubernetes object
metadata:
  name: nginx-deployment       # Name of the deployment
  labels:
    app: nginx                 # Label assigned to this deployment
spec:
  replicas: 3                  # Number of pod replicas
  selector:
    matchLabels:
      app: nginx               # Must match pod labels
  template:
    metadata:
      labels:
        app: nginx             # Label assigned to pods created by this deployment
    spec:
      containers:
        - name: nginx          # Container name
          image: nginx:latest  # Docker image
          ports:
            - containerPort: 80 # Port exposed inside the container
Resources I Used
(Note: This does not include resources I used for the web development project.)
Challenges I Faced
1️⃣ Authentication Struggle
Initially, I wanted to learn and use Supabase as my database and authentication system. However, I found it difficult to work with and eventually dropped it.
✅ Solution: Switched to NextAuth for authentication and used NeonDB instead of Supabase.
2️⃣ Provisioning WordPress Setup
I couldn't get the WordPress setup provisioned correctly at first.
✅ Solution: Restarted the whole process and fixed some typographical mistakes which solved the problem.
What’s Next?
Build a project where I actually use YAML in a real-world scenario.
Get started with Containers.
Let’s Connect!
If you have any recommended resources, better approaches to the challenges I faced, or just want to share some insights — I'd love to hear from you! Drop your thoughts in the comments.